2.4.8. Your Hotspots
Here you will configure the peer or hotspot you wish to use with the service. There are a number of different types of hotspots however most are derived from pi-star.
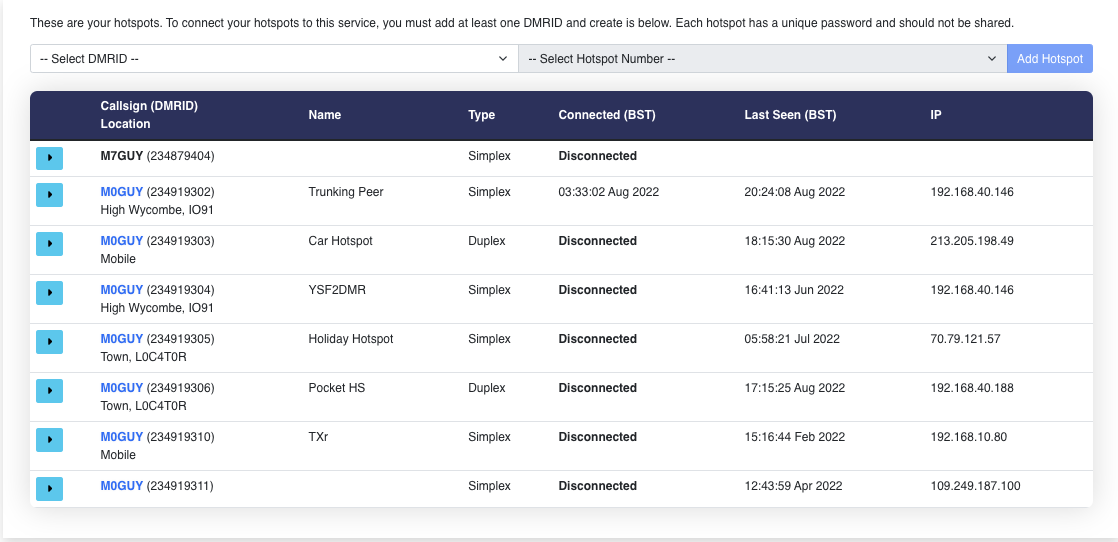
You can register up to 99 peers for each DMRID you have. Each peer _must_ have a unique ID which is made up of the DMRID and a 2 digit suffix.
2.4.8.1. Create Peer
Select a DMRID, a “Hotspot Number” and click on “Add Hotspot”. This will create your hotspot configuration. You will need to repeat the process for each peer you wish to connect. A new hotspot line will appear in the list.
2.4.8.2. Peer Details
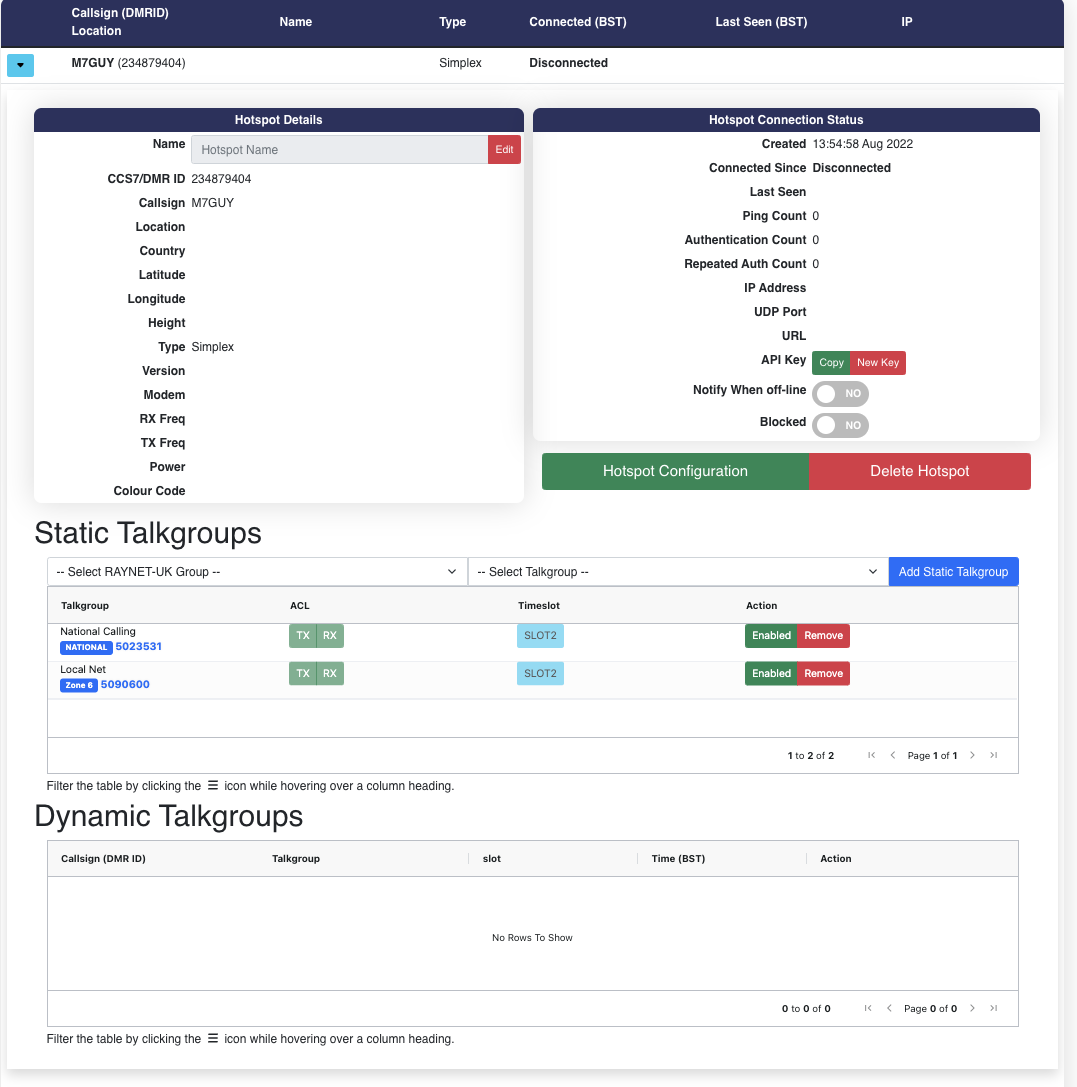
Use the button (Arrow) on the left side to expand the hotspots details.
From here you can name the hotspot, this is just a reference name for you, view the hotspot configuration (Green button), or delete the peer if it’s no longer required. You can also manage which Talkgroups you would always like to be sent to this hotspot (Static Talkgroups). This means whenever there is traffic for the Talkgroup it will be sent to your hotspot.
Warning
Never share your peer password with anyone, not even admins or group_admins.
When complete copy the lines from the window, these are the necessary configuration lines for your pi-star.
2.4.8.2.1. Static Talkgroups
The Static talkgroups section allows you to set or unset static talkgroups. To add a static talkgroup select it from the drop-down list. This list shows only the talkgroups you are allowed to use. If there are any that you think you should have, please contact your administrator.
If you wish to delete an existing static TG, just click on the ‘Remove’ Red button, on the line describing the TG you wish to remove.
Each static entry lists
Number - The Talkgroup number
Name - Talkgroup name, this can be changed by the group admins.
ACL - (Access Control List), shows if you are permitted to Receive (RX) and or Transmit (TX) on this Talkgroup. The ACL is managed by the Group Admins.
Timeslot - If you are using a simplex hotspot then this will be set to SLOT2 and cannot be changed. Duplex hotspots can use both Timeslots and selecting this button allows to change which Timeslot the traffic should be sent.
Enabled/Disabled - If you wish to temporarily stop listening to traffic on a Talkgroup you can disable it.
Delete - To permanently remove the Talkgroup from your static list. (You can re-add from the list)
2.4.8.2.1.1. Add ‘Static’ TG to the selected Peer
Click on the drop-down list ‘Static talk-groups’. Scroll and select the TG of interest, then click it. Then click the blue ‘Add static talk-group’ button next to the selection just made. It will then appear in the list of static groups your Peer (aka HotSpot or repeater) will receive traffic from.
Program/configure your radio(s) as needed to accept/use that new TG, or list that you have selected.
Note! If your radio transmits a call to any of the known RAYNET Private TG’s, but you have not explicitly setup such in the above webpage, then it will still be accepted and become an active “Dynamic” TG, that will remain in force until you TX on another TG that if also un-configured will then replace the previous Dynamically selected TG.
If however, you TX on a known/configured “Static” TG, then the last used “Dynamic” TG will be dropped (deleted.)
2.4.8.2.2. Dynamic Talkgroups
The table also duplicates part of the Dynamic talkgroups list; showing the dynamic talkgroup assigned to the peer, if there is one.

The callsign of the user who activated it on this peer, the talkgroup name and when used. Any calls originating on this talkgroup will be passed to the peer until you either use a different one on that peer or you press the Delete button. Static talkgroups can be assigned to a peer by selecting it in the Your Peers tab
2.4.8.3. Configuring your Pi-Star
If you’ve not yet setup your pi-star please review Software
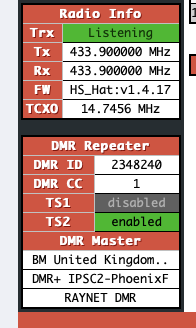
To allow the pi-star to route traffic to multiple DMR services, you must set the “DMR Master” to “DMRGateway”. Once applied, you can the select your Brandmeister Master, which might be “BM_United_Kingdom_2341”, or “BM_Europe_2001”, or anything else which makes sense for you.

Login and select configuration -> Expert

From the “Full Edit:” line select the “DMR GW” option. This will present a large textbox with all the DMR GW settings. Scroll to the bottom of this textfield and paste the configuration in.
Click “Apply Changes” to commit this change. Switching back to “Dashboard” or “Admin” should now show a new DMR service called “RAYNET DMR”.
You can confirm that the peer has registered with RAYNET DMR by refreshing you profile page and looking at the peers connection status. It will change to show the time of connection and also start showing when it was last seen on the network as well as the public IP address it connected from. If you don’t see a current time listed then your peer hasn’t established a connection, go back and verify your configuration.