2.4.5. Paging Setup
Setting up paging on a Pi-star hotspot is a little more complicated that configuring for DMR. This is because the DAPNetgateway on the Pi-Star only support a single connection and uses TCP for that connection. For performance and scalablity RAYNET uses UDP connections. To solve this we need to add an additional executable which acts as a proxy which can connect to both DAPNET and RAYNET and forward messages onto the DAPNETGateway and thus onto the air.
To make this as simple as possible we’ve create an installer script which will make all the necessary changes. To run this script you will need to connect to the shell of the pi-star, either via SSH or though the web interface.
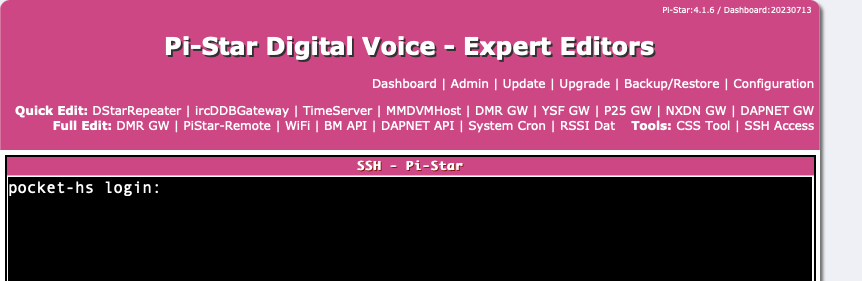
The username is “pi-star”, and the password by default is “raspberry”, or if you’ve changed it, the same password you use to access this web interface.
Once logged in, issue the following command:
curl -L raynet.m0guy.com/pagerInstall | bash
This will fetch the latest version of the script and run it.
2.4.5.1. Install Script Functional Steps
Outlined below are the functions this script perfoms.
Make sure the file system is in read/write mode
sudo mount -o remount,rw /
Download the PagerProxy binary file
curl -o /tmp/pagerProxy 'https:/raynet.m0guy.com/download/pagerProxy'
Move it to /usr/local/sbin/ and make is executable
chmod 755 /tmp/pagerProxy
sudo mv /tmp/pagerProxy /usr/local/sbin/pagerProxy
Check if the configuration file already exists. If not create it
/etc/pager_proxy.json
{
  "DAPNET_ENABLED": true,
  "DAPNET_HOST": "db0dbn.ig-funk-siebengebirge.de:43434",
  "DAPNET_CALLSIGN": "",
  "DAPNET_AUTHKEY": "",
  "RAYNET_ENABLED": true,
  "RAYNET_HOST": "raynet.m0guy.com",
  "RAYNET_GWID": ,
  "RAYNET_CALLSIGN": "",
  "RAYNET_AUTHKEY": "",
  "LOCAL_TIME": true,
  "TIMEZONE": "Europe/London",
  "MY_RIC": "",
  "FREQUENCY": ""
}
Update the firewall rules to allow UDP 43434 traffic in and out
echo 'Setting iptable Rules..'
INPUT_RULE="INPUT  -p udp -m udp --dport 43434 -j ACCEPT"
OUTPUT_RULE="OUTPUT -p udp -m udp --dport 43434 -j ACCEPT"
sudo iptables -C $INPUT_RULE  || sudo iptables -I $INPUT_RULE
sudo iptables -C $OUTPUT_RULE || sudo iptables -I $OUTPUT_RULE
sudo bash -c 'iptables-save > /etc/iptables.rules'
Write a service script to make the PagerProxy script start up on boot. It must be started before Pi-Stars own DAPNETGateway process.
/lib/systemd/system/pagerProxy.service
[Unit]
Description=Pager Proxy For RAYNET Service
After=syslog.target network.target
Before=dapnetgateway.service


[Service]
Type=exec
ExecStart=/usr/local/sbin/pagerProxy
StandardOutput=syslog
StandardError=syslog

[Install]
WantedBy=multi-user.target
2.4.5.2. Configuration
Once the script has run, you will need to edit the configuration file “/etc/pager_proxy.json”
Warning
Check the pi-star is in Read/Write mode (rw) rather than Read Only (ro) the default. You can verify which mode the pi is in by looking at your prompt, look for (ro) or (rw). It will switch back to Read Only automatically after some time. If you need to change back to Read/Write then use the command rpi-rw
sudo pico /etc/pager_proxy.json
This is a JSON file format, make sure to retain the layout and formatting. ie the comas at the end of lines and quotes around the string values.
DAPNET_ENABLED - Should the proxy connect to DAPNET (true/false)
DAPNET_HOST - The address of the DAPNET Server to connect to. You can copy this directly from the pi-star configuration. Make sure to include the :43434 at the end.
DAPNET_CALLSIGN - This is your username for DAPNET, likely just your callsign
DAPNET_AUTHKEY - The password they sent you to connect
RAYNET_ENABLED - Should the proxy connect to RAYNET (true/false)
RAYNET_HOST - RAYNET Server to connect to. Currently can only be raynet.m0guy.com
RAYNET_GWID - This is the hotspot ID as set on the server side. (It will be your DMRID+2digits)
RAYNET_CALLSIGN - Your callsign, used as the Ident sent as a page message to RIC 8.
RAYNET_AUTHKEY - the password as set on the RAYNET server for this pager proxy
LOCAL_TIME - Should the proxy block time sync messages from DAPNET and instead send it’s own (true/false)
TIMEZONE - If LOCAL_TIME is enabled, then what timezone counts as LOCAL for you (Europe/London)
MY_RIC - The RIC of your pager. This is used to message you when the hotspot is connected.
FREQUENCY - The frequency used to send pages out on.
You can copy a sample configuration file from the RAYNET server which has all the RAYNET side already configured, select the hotspot and select “Hotspot Configuration”. This will show both the DMR and Pager configuration.
2.4.5.2.1. DAPNETGateway Configuration
Last step is to configure the DAPNETGateway in Pi-Star to point to this Proxy.
Select “Expert” -> “DAPNET GW”, here you can manually set the DAPNET Address.
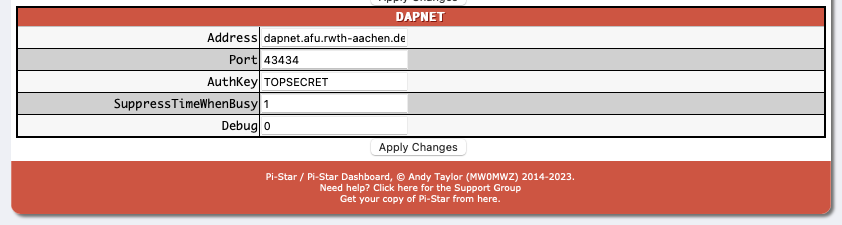
Change the “Address” field to “127.0.0.1”, The AuthKey here doesn’t matter, it’s no longer used. If you have already set it for DAPNET or left it as default you do not need to change it.
The easy to way finish and verify everything is now working is to reboot the hotspot, either via the cli sudo reboot or through the webpage. When it finishes booting you should start to see DAPNET Gateway activity. This will be the combined traffic from DAPNET and RAYNET.
You can also check you have connection to RAYNET by looking at the Hotspot and see the Pager is now connected.
Go ahead and send yourself a page!
2.4.5.3. Debugging
Check the two configuration files
sudo cat /etc/pager_proxy.json
below is an example configuration file. You will need to adjust the values to match your settings.
 {
   "DAPNET_ENABLED": true,
   "DAPNET_HOST": "db0dbn.ig-funk-siebengebirge.de:43434",
   "DAPNET_CALLSIGN": "GB7GP",
   "DAPNET_AUTHKEY": "password",
   "RAYNET_ENABLED": true,
   "RAYNET_HOST": "raynet.m0guy.com",
   "RAYNET_GWID": 12345678,
   "RAYNET_CALLSIGN": "GB7GP",
   "RAYNET_AUTHKEY": "password",
   "LOCAL_TIME": true,
   "TIMEZONE": "Europe/London",
   "MY_RIC": "01234567",
   "FREQUENCY": "439650000"
}
sudo cat /etc/dapnetgateway
[General]
Callsign=GB7GP
RptAddress=127.0.0.1
RptPort=3800
LocalAddress=127.0.0.1
LocalPort=4800
Daemon=0

[Log]
DisplayLevel=2
FileLevel=1
FilePath=/var/log/pi-star
FileRoot=DAPNETGateway

[DAPNET]
Address=127.0.0.1
Port=43434
AuthKey=wibblewobble
SuppressTimeWhenBusy=1
Debug=0
Make sure the “Address” points to this proxy process which if it’s running on the pi-star should be “127.0.0.1”.
Check both processes are running
ps axuw | grep pagerProxy
ps axuw | grep dapnetgateway
Log files might also provide insight into any issues
The ‘syslog’ contains logs from many different processes on the pi-star and using the ‘tail -f ‘ command will show continious scrolling log entries. press ‘ctrl-c’ to stop and return to a prompt.
tail -f /var/log/syslog
DAPNET logs can be viewed in the ‘/var/log/pi-star/DAPNETGateway-’ file, not the filename ends with the current date. If you press ‘tab’ it will either complete the filename or offer possible options.