3.3. Whitelisting DMRIDs
Under the terms of the UK Amateur Radio Licence an NOV is required to run a Repeater. It has been argued that running your personal Hotspot in ‘Public’ mode could need an NOV; particularly if it is Unattended operation. If you keep the Hotspot at hand and only run very low power this requirement probably does not apply.
New in version Pi-Star: 4.1.4
3.3.1. New Method
Since version 4.1.4 of the Pi-Star software you can now add DMRIDs on the standard configuration page. Change the “Node Type” to public and apply changes. You can now see the additional configuration to add DMRIDs to the whitelist.
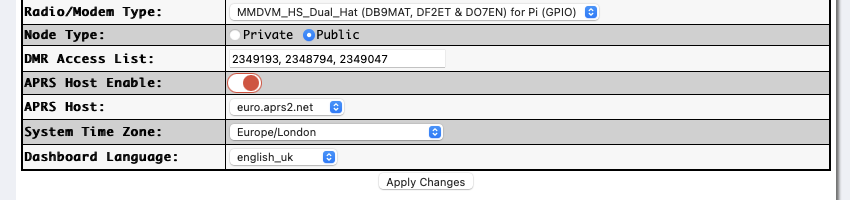
Simply add the DMRIDs in a comma separated list to the “DMR Access List” box.
Deprecated since version Pi-Star: 4.1.4
3.3.2. old Method
This is the old method for setting up whitelisting of DMRIDs. It’s left here as a reference.
Setting the Hotspot to ‘Private’ locks it to the single DMR ID you have set. However, if you have more than one DMR ID, or other users will need to use it, you will have to set it to ‘Public’. Because the software is able to be used as a proper Repeater it includes tools to manage the users. In particular you can set a Whitelist of DMR IDs allowed to use it. The way to do this is not straight forward and you must take a backup before you start.
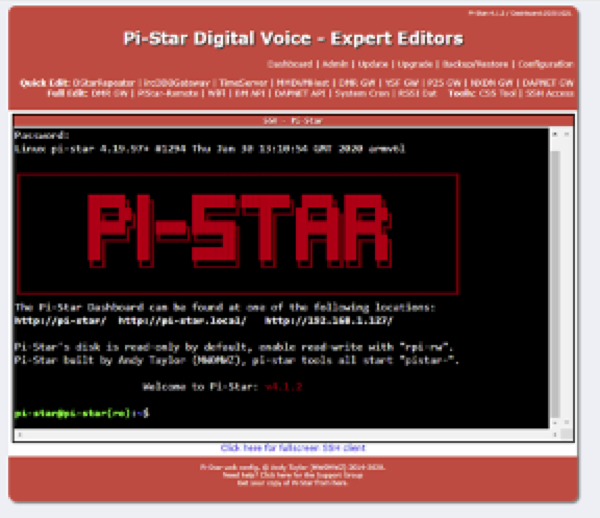
Then, from the Dashboard you need to select ‘Configuration’, ‘Expert’ and then in the Full Edit section click on ‘SSH Access’. This will open a window and ask for your Username and Password for the Pi-star. If you haven’t changed them, they are pi-star and raspberry. The following display then appears.
You now need to enter the following commands at the $ prompt, exactly as shown:
rpi-rwThis is to allow the editor to change the file.cd /etcThis is to change the working directory.sudo nano mmdvmhostThis opens the configuration file into an editor.
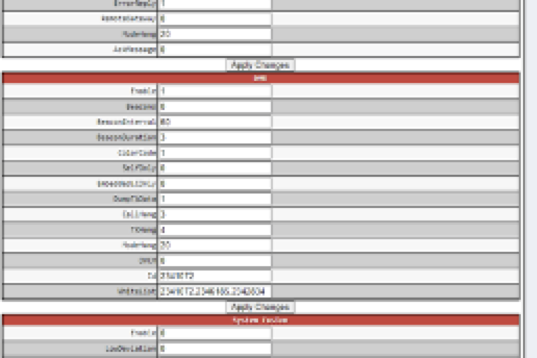
Scroll down (using the cursor keys) the file to the [DMR] section. On the end of this section append the following line (the capitalisation is important):
WhiteList=2341072,2346185 This is the comma separated list of the DMR IDs you wish to allow. Replace the examples given with your list of DMR IDs.
Having added the lines, you need to press <Ctrl>O to write the file, <RTN> to use the same filename as before, back to the sdcard. Once saved press <Ctrl>X to exit the editor. Close the SSH session by typing exit at the $ prompt. This will show logout followed by Session Closed.
You will now be back to the normal display. Select ‘Configuration’ again and scroll down to the General Configuration section. In the Node Type: field change the option from Private to Public (if you haven’t done so already).
Finally, to make your changes take effect you need to restart the services. Just click on any of the ‘Apply Changes’ buttons (even if you didn’t need to change the Node Type option) This causes the Hotspot to restart, reloading your new configuration file in the process.
If all has gone well, the Hotspot will now only respond to radios using the DMR IDs you listed in the WhiteList command.
Please note that if the Hotspot is a simplex device, local radios with ‘blocked’ DMR IDs will still be able to hear transmissions to and from the Hotspot and transmit locally to other local stations. If it is a duplex Hotspot, they will only be able to transmit locally if they know the appropriate frequency split. In neither case will their transmissions be transferred through the Hotspot.
If you wish to change the DMR IDs, or add some more then go to the ‘Configuration’, ’Expert’ screen and select ‘MMDVMHost’.
At the bottom of the DMR section there will be a field called WhiteList where you can change the entries. Remembering to select ‘Apply Changes’ to make them take effect.