3.2. YSF Configuration of a Pi-star Hotspot for use with the RAYNET server
Open your Pi-star dashboard and select Configuration.
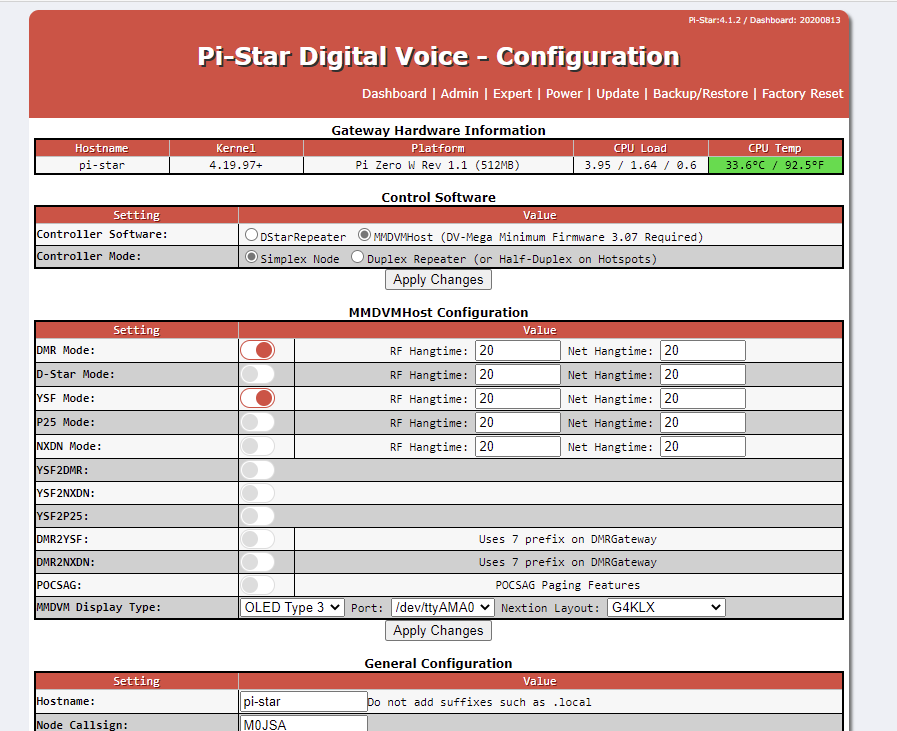
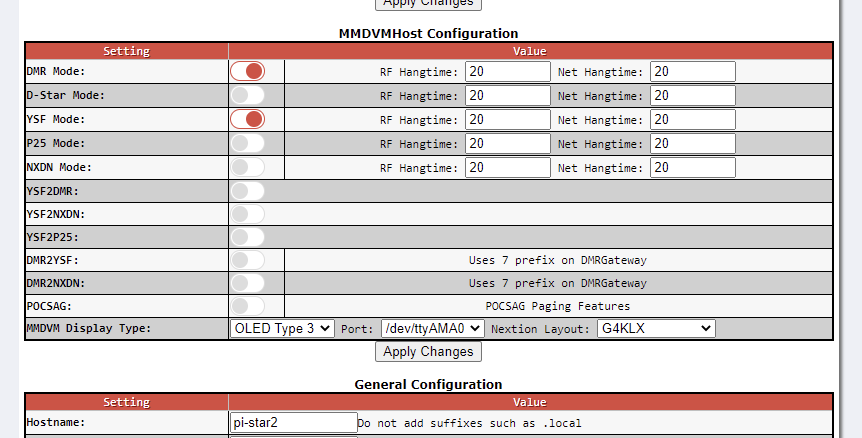
Change the setting of YSF Mode to switch it on. Then click on Apply Changes.
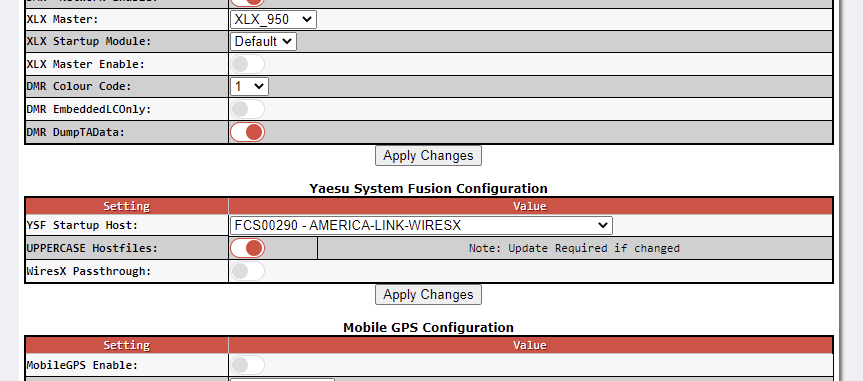
When the Pi-star restarts there will be a new Yaesu System Fusion Configuration section appear, beneath the DMR Configuration one.
By default, this selects FCS00290 as the host. Change this to YSF23501 – GB-CQ-UK-YCS – (YCS235). Also change the WiresX Passthrough to on.
Once again click on Apply Changes. When the Pi-star reboots you will notice that the once steady LEDs on the MMDVM board are now alternating between the two enabled modes.
The dashboard will now look something like this:
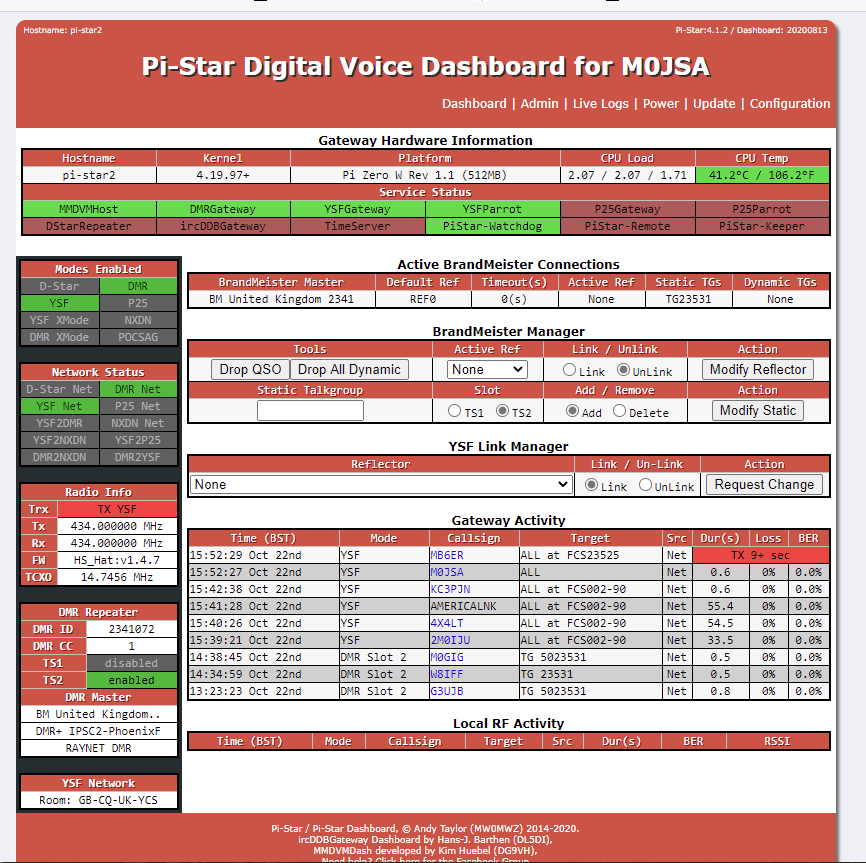
You will notice in the Service Status section that you now have, as well as the DMRGateway, YSFGateway and YSFParrot; hopefully all showing green. Also bottom left you will see a YSF Network panel that shows you are connected to the GB-CQ-UK-YCS room.
Now go to the radio but be sure you can also see the dashboard. The radio I used is an FT-991 with a touch screen. Consult your radio manual for the appropriate controls and displays on your radio.
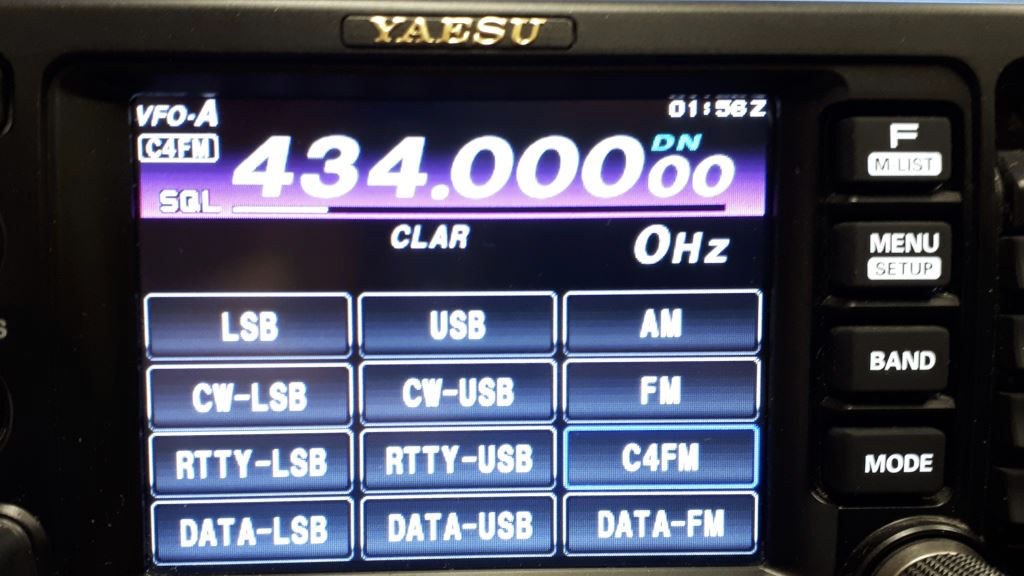
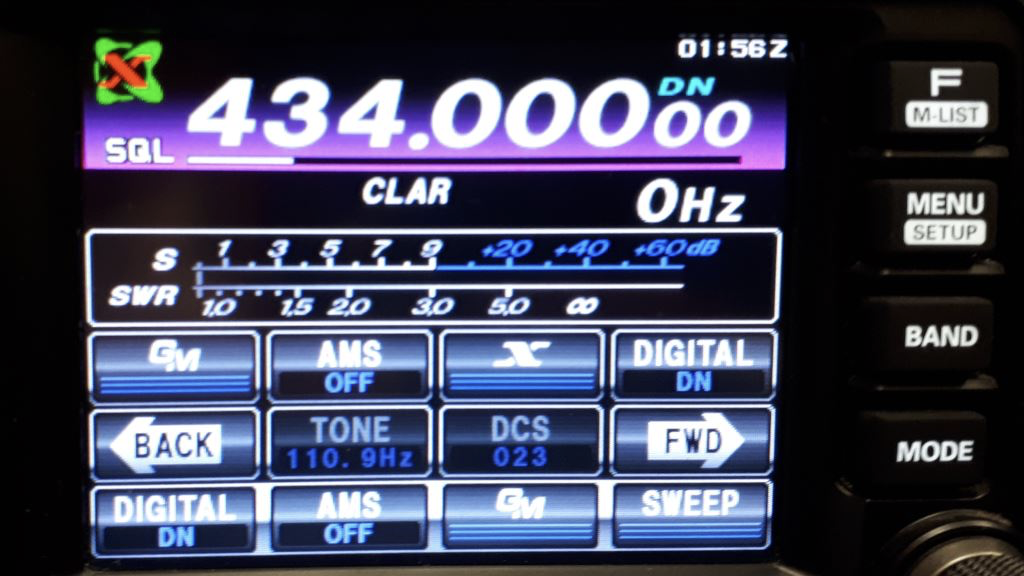
Tune the radio to the Hotspot. Press the Mode button on the radio and select C4FM. The mode on the display should then change to C4FM. If you can see YSF traffic on the Hotspot dashboard you should be able to hear the QSO. If not, press the PTT to get the hotspot into YSF mode.
Go back to the Hotpot Admin Dashboard. In the YSF Link Manager section select Unlink and click on Request Change. This will prevent you hearing other Fusion traffic.
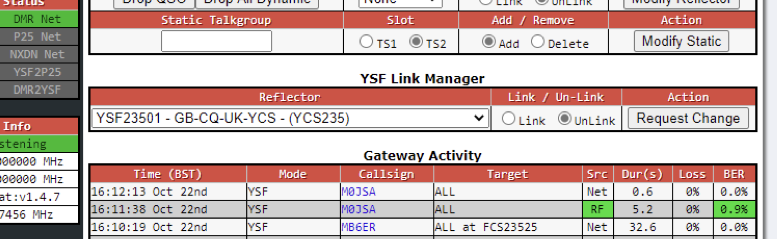
Now, on the radio briefly key the PTT. You should see your transmission appear in the Local RF Activity section of the dashboard.
If so then so far, so good.
Press the F / M-List button on the radio to bring up the function keys display. On this touch the X button to activate WiresX. The radio will then attempt to connect to the Hotpsot. This may take one or two attempts! Just press X again. While connecting a Green box will appear top-left on the display, inside which will be a flashing red X.

Once it is connected the red X will go steady and the display will change to show, beneath the S-meter, a connected message and the name of the node. In my case this was M0JSA-ND M0JSA_Pi-Star. Yours will be similar but with your own call sign. (Note, there will be no box beneath this. In the example I had previously connected to the RAYNET-UK room; shown greyed out as not connected.)

Touch the SEARCH&DIRECT button to bring up an on-screen keypad. Touch the DIRECT button and then the ID button.
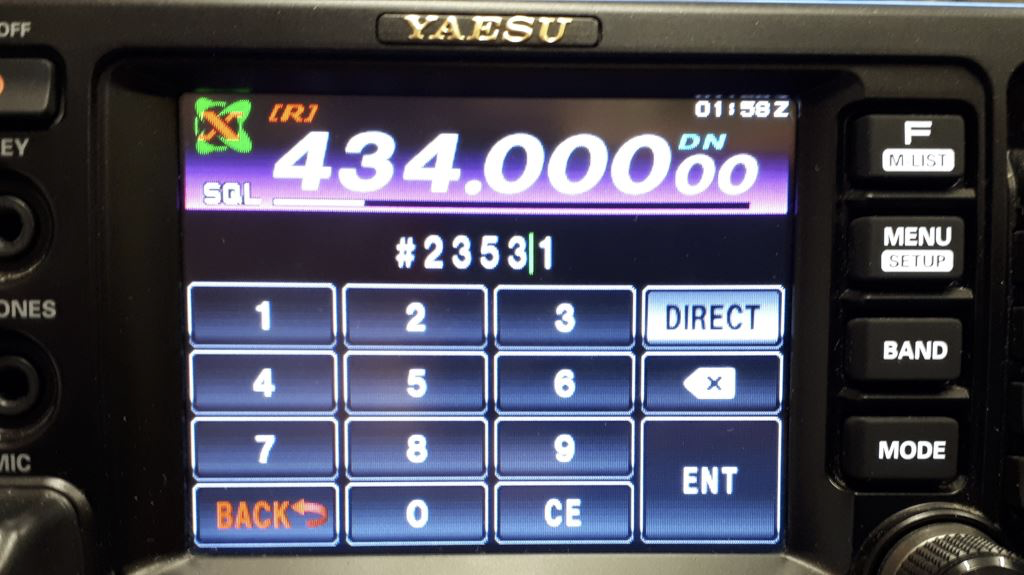
This will bring up a numeric keypad. Enter 23531 after the # and press ENT. The number entered will flash and the radio will attempt to connect to the room.
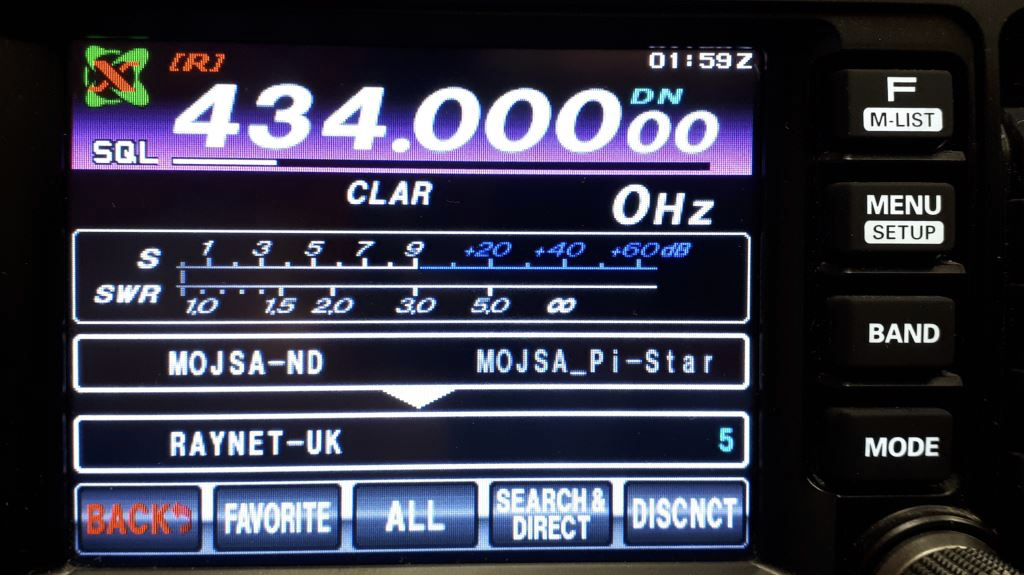
Once connected the display will change again to show the room underneath the Node. In our case it should say RAYNET-UK.
You should be able to transmit and, if all goes well, come out of the DMR Server on 5023531. If you do not transmit or the room is idle the connection will drop. Just touch the RAYNET-UK box on the display (now greyed out) to re-establish the connection.
Alan Jones,
M0JSA East Suffolk Group
In the MMDVMHost Configuration section of the Configuration page there are pairs of RF Hangtime and Net Hangtime edit boxes for each of the modes. These determine how long the Hotspot will hold a Mode following a transmission (either from RF or the net) before reverting to search mode.
In the MMDVMHost Configuration section of the Configuration page there are pairs of RF Hangtime and Net Hangtime edit boxes for each of the modes. These determine how long the Hotspot will hold a Mode following a transmission (either from RF or the net) before reverting to search mode.